![(please configure the [header_logo] section in trac.ini)](/repos/chrome/site/pj.jpg)

Getting Started: Building for BlackBerry 10 (BB10)
TracNav
Getting Started- Moved to: https://docs.pjsip.org/en/latest/index.html#get-started
Preparation
Build for Desktop
Build for Mobile
- iOS: Apple iPhone, iPad, and iPod Touch
- Android
- BlackBerry 10 (BB10)
- Windows Mobile
- Windows Phone 8.x and UWP
Symbian...
- Build for Other
Next: Using the libraries
See Also
- Getting Started: Building for BlackBerry 10 (BB10)
- Next Steps
- Performance Tuning
- Problems
Requirements
- You will need BlackBerry 10 Native SDK for native development.
- For Windows host, you will need MSys/MinGW to build PJSIP.
Configure and Build PJSIP
This tutorial applies to Linux, MacOSX, and Windows/MSys host.
Get PJSIP Source Code
Get the source code, if you haven't already. This tutorial applies to PJSIP version 2.2 and above (or the 2.1 from SVN trunk dated 2013/04/16 or later).
Configure PJSIP
Note for Windows host, the configure and build process are to be done on MSys/MinGW console.
- Run this in your BB10 NDK directory, otherwise the configure command will fail:
$ source $BBNDK_DIR/bbndk-env.sh
For Windows host, put back MSys/MinGW binary path to the beginning of environment variable PATH setting, otherwise MSys/MinGW standard tools will be overridden by BB10 NDK and the configure command will fail:$ export PATH="/usr/local/bin:/mingw/bin:/bin:$PATH"
- cd to PJSIP source directory.
- (For debug build) Run configure-bb10 script with debugging info and without optimization.
$ CFLAGS="-O -g" ./configure-bb10 --disable-speex-aec
See Build Customization section in Building with GNU page or run ./configure --help for more customization info. - Or for simulator target, run configure-bb10 with --simulator option"
$ CFLAGS="-O -g" ./configure-bb10 --disable-speex-aec --simulator
- For Windows host, edit pjsip.pri in the PJSIP root directory, replace '/C/' with 'C:/'.
- We suggest to fill in your config_site.h (pjlib/include/pj/config_site.h file) with the following:
#include <pj/config_site_sample.h>
- Run make dep to build the dependencies:
$ make dep
At this point, you can build PJSIP simply by executing make, but we'll show you how to import PJSIP into Momentics IDE and build it from there.
The pjsip.pri QMake Project File
The configure-bb10 script above also creates pjsip.pri at the root of PJSIP directory. This file contains PJSIP build settings in QMake project (.pro) file format, which can be included in application's .pro file to build with PJSIP.
See creating new app section for more info.
(Optional) Import and Build PJSIP to/in Momentics IDE
This is optional, as you can just run make in PJSIP directory to build PJSIP. But nevertheless this is a lot more convenient especially if you are developing PJSIP. Note that this does not work on Windows host, so for Windows host, just use make instead.
Import PJSIP as New Project:
- Select File --> Import..
- From the list, open BlackBerry, select Existing Code as BlackBerry C/C++ Makefile Project, and click Next >
- In the "Import.." wizard, set
- Project name: pjproject (or other name. But in this tutorial we will refer the PJSIP project as pjproject)
- Code location: the directory where you extract PJSIP to
- Language: C and click Next >
- Accept the default "Use workspace SDK selection", and click Finish.
Create Build Configuration:
- Right click pjproject from the Project Explorer view (tab), then select Build Configurations --> Manage from the pop-up menu.
- In the dialog, click New.. to create new build configuration
- In "Create New Configuration Dialog":
- set Name: PJSIP-Default
- press OK to close the dialog
- In "Create New Configuration Dialog":
- Set PJSIP-Default as the active build configuration by selecting it from the list and pressing the Set Active button
- Press OK to close the "Manage Configurations" dialog
Configure Build Configuration:
- Right click pjproject from the Project Explorer view (tab) and select Properties from the pop-up menu.
- In the Properties for pjproject dialog:
- Select C/C++ Build from the left tree pane
- Make sure "PJSIP-Default [Active]" Configuration is selected from the combo box in the top center of the dialog.
- if it's not marked as active, make it active
- Go to Behaviour tab
- Set Make build target in the textbox right to Build on resource save (Auto build) to: all
- I personally uncheck the Build on resource save (Auto build) (I'd rather build manually)
- Also set the build target in the textbox right to Build (Incremental build) to: "all"
- Click Apply
- Click OK to close the dialog
Now build the pjproject PJSIP project.
Building and Running the pjsua Demo Application
PJSIP comes with a fully featured pjsua application which runs on all platforms that PJSIP supports including BB10.
Configuring the Device and Momentics IDE
For the rest of this tutorial, we will assume that you already have the IDE and target device (or simulator) configured for debugging BB10 native applications (any native applications, not just PJSIP). If not, follow these instructions from BlackBerry developer site.
Import the PjsuaBB Project
In Momentics IDE:
- Select File --> Import..
- Select General and Existing Projects into Workspace, and press Next >
- In Import.. dialog:
- Select root directory: $PJ_DIR/pjsip-apps/src/pjsua/bb10
Once you select the directory, PjsuaBB will appear under Projects list in the dialog. Make sure it is checked (the default). Click Finish
Build PjsuaBB
Just build it. You need to build the app before creating a Debug Configuration below (so that Eclipse can find the app's binary).
Create Debug Configuration
- Highlight "PjsuaBB" from the Project Navigator, select Run --> Debug Configurations.. from the main menu
- From the left list, right click BlackBerry C/C++ Application, and select New..
- New debug settings will appear with default values
- Go to Debugger tab and uncheck Stop on startup
- Press Apply
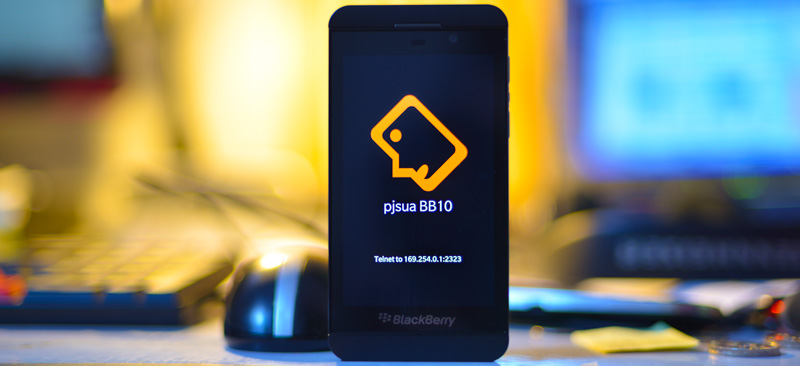
Running PjsuaBB
Launch debugging session for PjsuaBB. Wait until the app is loaded on the device. You will see telnet instructions on the device's screen. Telnet to this address to operate the application. See PJSUA CLI Manual for commands available.

Customizing SIP Settings
Currently this can only be done by modifying the argv variable in applicationui.cpp:
    char *argv[] = { (char*)"pjsuabb",
		     (char*)"--use-cli",
		     (char*)"--no-cli-console",
		     (char*)"--cli-telnet-port=2323",
		     // Add your settings here
		     NULL };
Next Steps
Creating a New PJSIP Based Application
Creating a BlackBerry Native Application
Use Momentics new project wizard to create a new BlackBerry native application. This should be easy, and we will not explain it here.
Configure the permissions by double-clicking bar-descriptor.xml file and select Application tab from the bottom of the page, and check these permissions:
- Internet
- Microphone
- Run When Backgrounded
Integrating PJSIP to Your Application
Integrating PJSIP settings into the app is very easy:
- Open the app's .pro QMake project file
- Include pjsip.pri file in the relevant target section, e.g.:
..
device {
    CONFIG(debug, debug|release) {
        ..
        include(../../../../pjsip.pri)
        LIBS += -lbb
        ..
    }
}
..
As explained above, the pjsip.pri file is generated by configure-bb10 script and contains compilation and link flags to integrate PJSIP with your app.
Multiple PJSIP Build Configurations
If you want to have multiple PJSIP build configurations for your app (for example, Device-Debug, Device-Release, and/or Simulator), you can use one of the following approaches when building PJSIP.
Option 1: Build PJSIP in Multiple Directories
This is of course the easiest, just extract or checkout PJSIP to multiple locations, configure it differently, build, and include pjsip.pri file from the right location to the relevant section of you application's QMake .pro file.
Option 2: Install PJSIP in Multiple Directories
You can use this option if you don't want to checkout PJSIP to multiple directories (for example, to simplify development):
- Checkout PJSIP to a directory
- Configure with the right settings for the target
- Set a specific directory as --prefix argument to ./configure-bb10. This is where PJSIP will be installed to
- Build
- Run make install to install PJSIP header and lib files to the installation directory as specified by "--prefix" option.
- Edit pjsip.pri file, change the paths to point to the installation directory.
- Rename pjsip.pri to something more appropriate, e.g. pjsip-device-debug.pri
- Include pjsip-device-debug.pri in the relevant section of your .pro file.
- Repeat from step 2 for each target
Using PjsuaBB in Device-Release Target
In this section we will build PJSIP and PjsuaBB in Device-Release mode and sideloading it to the device. Sideloading is an Internet term (like download and upload) for transferring data between two local devices, and here it means installing an app to the device from the computer without publishing it through Blackberry AppWorld.
Building Device-Release Target
For PJSIP, follow Multiple Settings section above on how to build PJSIP in Device-Release build target. Or otherwise the easiest way is to re-run ./configure-bb10 with the appropriate CFLAGS and rebuild PJSIP.
Then in Momentics IDE, select Device-Release as the active build configuration for PjsuaBB, and build the application.
Creating .bar Package
Follow the Sign and publish your app tutorial from Blackberry Native SDK site to create the .bar package. You don't need to publish your app now (unless you want to of course).
Installing (a.k.a Sideloading) to Device
As far as I know there are three ways to sideload an app to the device:
- Using DDPB to sideload apps to Blackberry PlayBook. I think this tool has been deprecated in favor of vnBB10 below.
- Using vnBB10 to sideload apps to BB10 and PlayBook. The tool works on both Mac and Windows (no Linux!)
- Using a Chrome extension to sideload apps to BB10 and PlayBook. This works on Linux as well as Mac and Windows. I only tested this.
For general tutorial on sideloading apps to your BB10 device please see this tutorial (on Windows).
Troubleshooting Problems
I am by no means expert on sideloading, so please contact the relevant forum for help. But I may have one or more tips for troubleshooting problems:
- Make sure your debug token is valid. In my experience, the Chrome extension was unable to connect to my device due to expired debug token. Remember that debug token expires every 30 days. It works fine after the debug token is renewed. The easiest way to renew debug token is from Momentics IDE:
- go to Preferences --> Blackberry --> Signing
- select the expired debug token, click Renew, then Upload to upload to the device.
Performance Tuning
This section describes some performance tuning tips to reduce CPU utilization on the device. These are subset of the more thorough performance tuning as explained in the FAQ, please check that out for further reading.
The recommendations below were based on experimentation on Z10 device (hardware revision STL100-1). The full result of the experimentation is attached as PDF at the bottom of this page. The patch to measure CPU utilization is also attached.
Tips
Tune Resampling Quality
Because default media clock rate is 16Khz (the pjsua_media_config.clock_rate setting), sample rate conversion (a.k.a resampling) will be used whenever a media port with clock rate other than 16Khz is added to the conference bridge. This happens, for example, when call is established with narrowband codec such as G.711, GSM, iLBC, Speex-NB, and AMR-NB.
By default high quality resampling with large filter is used, and this uses a lot of CPU. The small filter resample produces indistinguishable result on mobile devices, and uses much less CPU. The small filter resample can be activated by setting pjsua_media_config.quality to 4 (default is 8), or by declaring PJSUA_DEFAULT_CODEC_QUALITY to 4 in config_site.h. This is now the default value in config_site_sample.h, so if your config_site.h includes config_site_sample.h (which is recommended above), you will get this setting.
Changing pjsua_media_config.quality from 8 to 4 reduces CPU utilization for PCMU call from 13% to 3%.
Avoid Resampling Altogether
If all of your audio codecs are narrowband, then you should initialize PJSUA-LIB with 8Khz clock rate (set pjsua_media_config.clock_rate to 8000) to avoid resampling altogether.
Without resampling, a PCMU call uses 0% CPU!
Add Optimization Flags to Your Build
Be aware that configure-bb10 script does not enable optimization by default. This applies to PJSIP's configure-bb10 script and also the generic-configure-bb10 for building OpenCore? AMR-NB that is distributed by PJSIP-Demo. Both do not put "-O2" by default.
Adding "-O2" could potentially reduce CPU utilization by 20%.
Codecs
Codec is the main contributor of CPU usage. Below is rough CPU utilization measurement for some codecs. Please see the attached PDF document for more complete results.
Narrowband, without resampling (pjsua_media_config.clock_rate=8000):
- PCMU: 0%
- iLBC: 13%
- OpenCore AMR-NB: 26%
Narrowband, with small filter resampling (pjsua_media_config.clock_rate=16000, pjsua_media_config.quality=4):
- PCMU: 3%
- iLBC: 15%
- OpenCore AMR-NB: 27%
Wideband, without resampling (pjsua_media_config.clock_rate=16000):
- G.722: 5%
- Speex-WB: 20%
Problems
Missing Separator
If you forgot to run source bbndk-env.sh (as explained above) before running make dep, the dependency files will get corrupted and make will fail with "** missing separator" error. If this happens, you'll have to delete each of those dependency files manually and re-run make dep.
GSM Call Interruption Problem
If a VoIP call is in progress when an incoming GSM call arrives, and if the user accepts the GSM call, the audio routing of the phone is flawed producing the following result: The VoIP call goes to speaker and the GSM call does not “grab” the audio channels so you get a “null” GSM call and the VoIP call carries on with speaker.
To prevent this from happening, application must implement GSM call detection using BB10 native API, and when it detects a GSM call, it should close PJSIP sound device by using either pjsua_set_null_snd_dev() or pjsua_set_no_snd_dev() and put the VoIP call on hold before accepting the GSM call.
Thank you Bob Cripps of Truphone for the note.
Unable to Get Sound Device Parameters
This error happens because PJSIP is unable to open the audio capture device. Make sure you have Audio Capture application permissions set correctly.
Troubleshooting BlackBerry Target Device
If you're having problems with target device, make sure that:
- Development mode is turned ON on the device (Settings --> Security and Privacy --> Development Mode)
- Otherwise when you connect the USB you'll have a random IP address and you will not be able to connect to it in Momentics
- You can connect to BlackBerry target device in Momentics IDE. A BlackBerry target device will be named something like usb or usb1 if you're connecting via USB
- right click the target device in Project Explorer, select BlackBerry Tools --> Connect
If you can't connect, make sure that:- the device is really connected
- it has the right IP address
- you can ping it (make sure Development Mode is ON)
- the IP address is correct in Momentics target properties
- right click the target device in Project Explorer, select BlackBerry Tools --> Connect
Enabling TLS using bundled OpenSSL
BB10 NDK already ships OpenSSL dev lib, and to use it, just specify '--with-ssl=dummy_ssl_path' setting in configure param, e.g:
CFLAGS="-O -g" ./configure-bb10 --disable-speex-aec --with-ssl=dummy_ssl_path
In configure output, you should see line such as "OpenSSL library found, SSL support enabled". Note that you may also need to add "LIBS += -lcrypto" in the .pro file.
Attachments (4)
- PjsuaBB.jpg (91.9 KB) - added by bennylp 12 years ago.
- PjsuaBB_telnet.jpg (35.9 KB) - added by bennylp 12 years ago.
- BB10 Performance measurement.pdf (65.6 KB) - added by bennylp 12 years ago.
- bb_measure_cpu.patch (4.3 KB) - added by bennylp 12 years ago.
Download all attachments as: .zip